Home

DIY: 4ft Copper Accent Planter

Copper Accent Modern Planter

So I fail at taking "process photos" & I'm sorry! To be honest, I wasn't sure this would end up being a DIY I wanted to share with you guys. They don't always work, you know!!! (For example, yesterday I tried to make a hanging-mason jar-coffee bean-candle-thing. Yea, had to blow that one out when I started smelling burning paper instead of the vanilla cappuccino I envisioned. Whoops!)

But, I actually really love this planter, and it was relatively easy. So I'll try my best to explain what I did. 

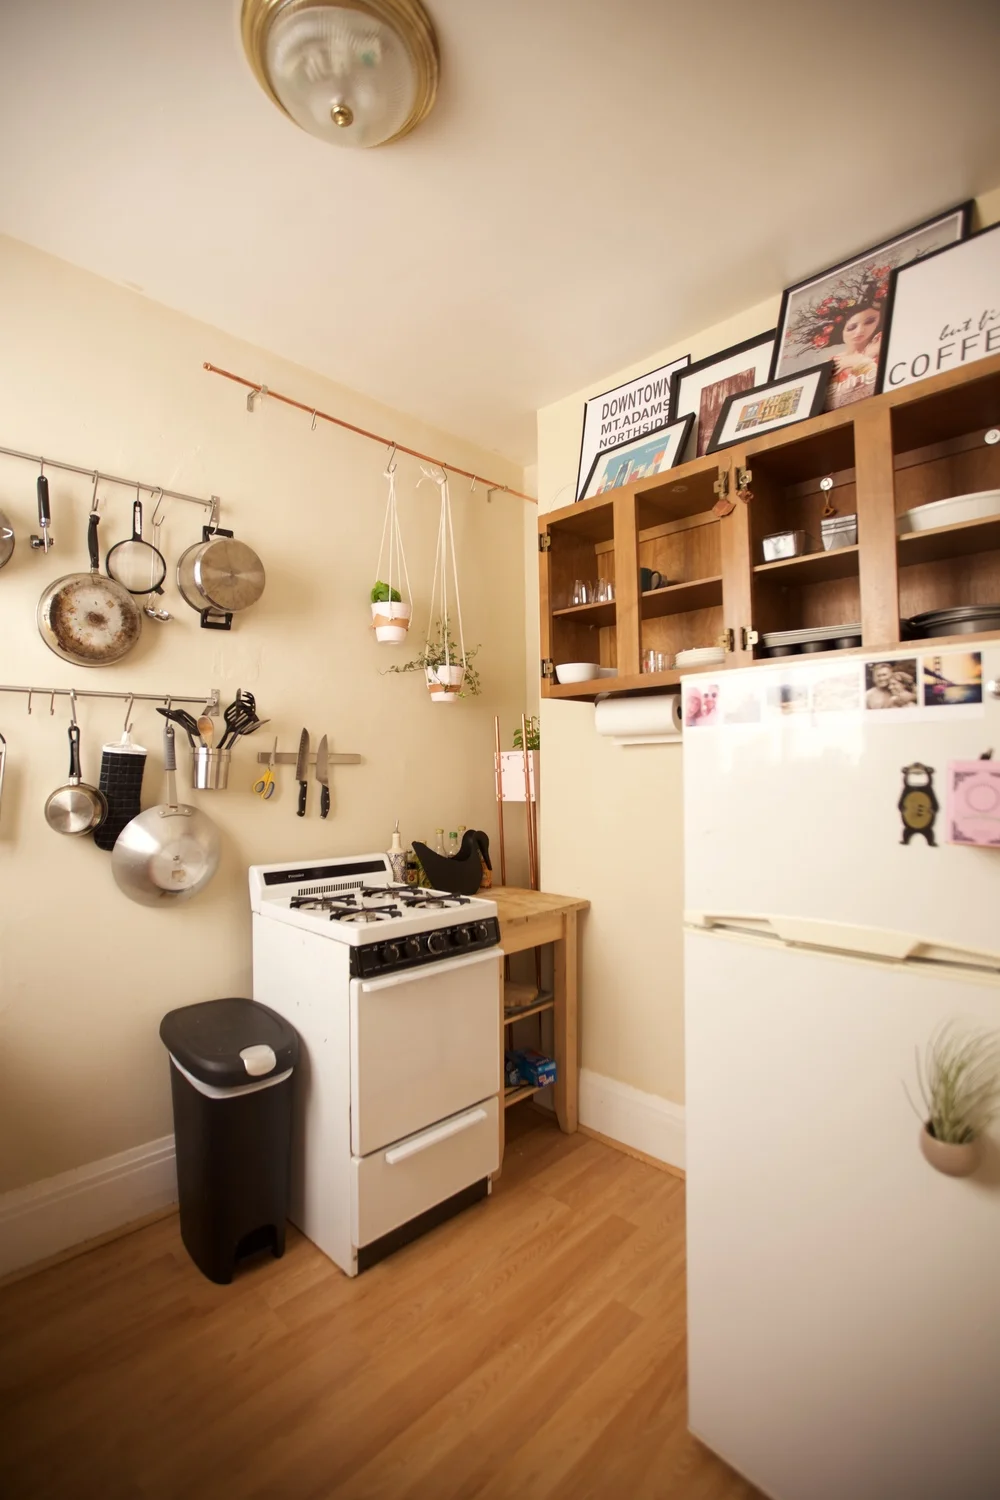
Like most of my blog posts, this one started with a problem. See, the only place plants can get light in my apartment is the kitchen. And my  windowsills are maxed out with succulents. Que Laura's cute pink window box planter from ABM! I knew I would need one taller (four feet to be exact - to lift my plants over the stove), and skinnier (to fit into a random weird corner in my kitchen), but still this idea seemed like a solid solution. 

So... To Michael's I went! I found a plywood box that was the perfect size for my little corner (8x8inches). It so happened to have a bunny face on it, gotta love that Easter clearance! The bunny face made painting this box kinda sad -- and difficult, ha! It took three days and three coats of paint to get that face covered!

But when it was dry, I bought four 4ft x 1/2inch copper pipes from Lowes (these are in the plumbing section). Across the aisle were matching copper brackets (actually called "pipe straps") that fit over the pipes (meaning, they were also 1/2 an inch). I got 12 of those and carried my loot home on Bart.

Using four c-clamps and a level, I clamped my pipes to the box and stood the whole thing up to find the height I wanted. While the pipes were still clamped on, I used a piece of masking tape to mark each pipe A-D and added corresponding tape on the corners of the box. STILL clamped and standing, I took a permanent marker and drew two lines on each pipe, marking where the top and bottom of the box should be in relation to the pipe.  

Finally, time to make those pipes into legs! I unclamped everything and took Pipe A and matched it with Corner A. With the box on it's side, and using the lines I drew on the copper pipe to measure where I needed to place it, I laid pipe straps on top of my pipe and used a power drill to drill right through the holes of pipe strap#1 and into my box. I screwed bolts into the holes and secured it with a nut to hold that first pipe strap in place. Then I followed this process for pipe straps #2 and #3, alternating between drilling holes and screwing in the bolts. Woohoo! One leg down, three to go! 

Once all the legs/pipes were screwed in place, I stood the planter up to make sure it was still balanced. According to my level, it was a little off. So I took a hammer and kinda, tapped the box into place (remember, we haven't actually screwed through the pipes at all, so this method works!).

Later, I added floor scratch pads to the bottom of each of the pipes. I've since found out about "end caps" and may look into this to top of my copper pipes.

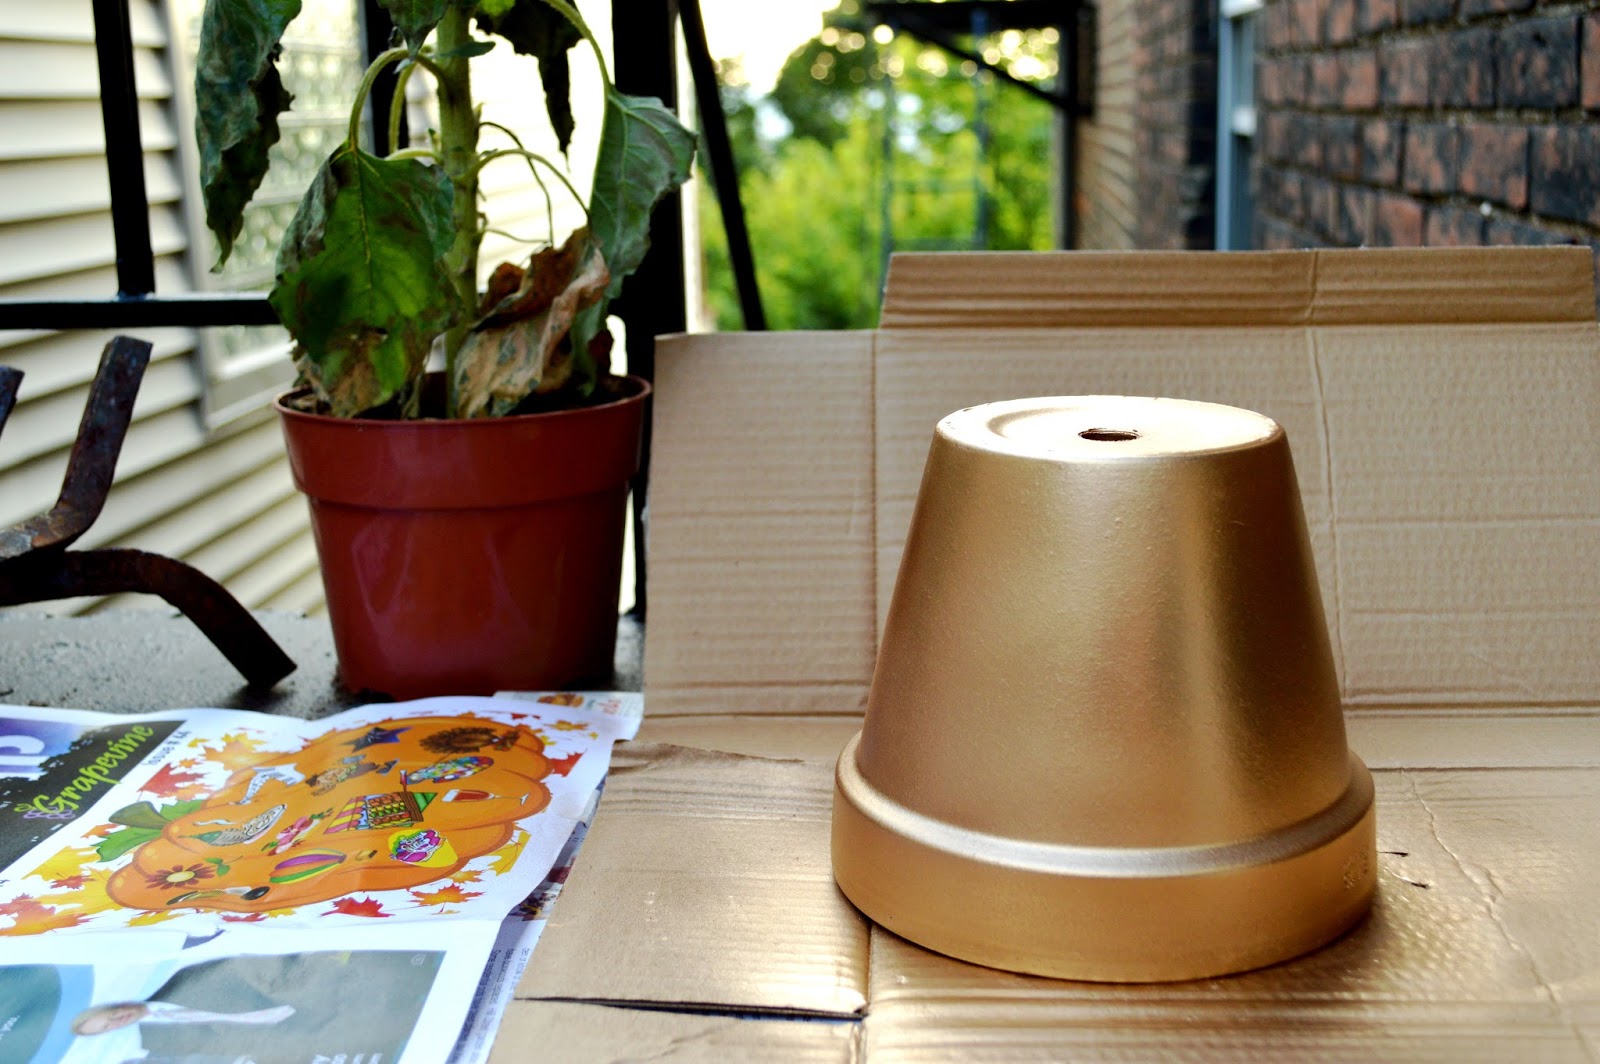
Finally, to make this into a real planter, I stopped at Lowes again. There I bought a plastic garden pot that would fit inside my box (meaning the pot was under 8 inches tall). I brought that home and painted it to match my box (which has handle holes, since it was an Easter Basket in a previous life 😁). After the paint dried, I dropped the plastic pot into my Bunny Box and Voila! A modern looking, copper accent 4-ft planter!

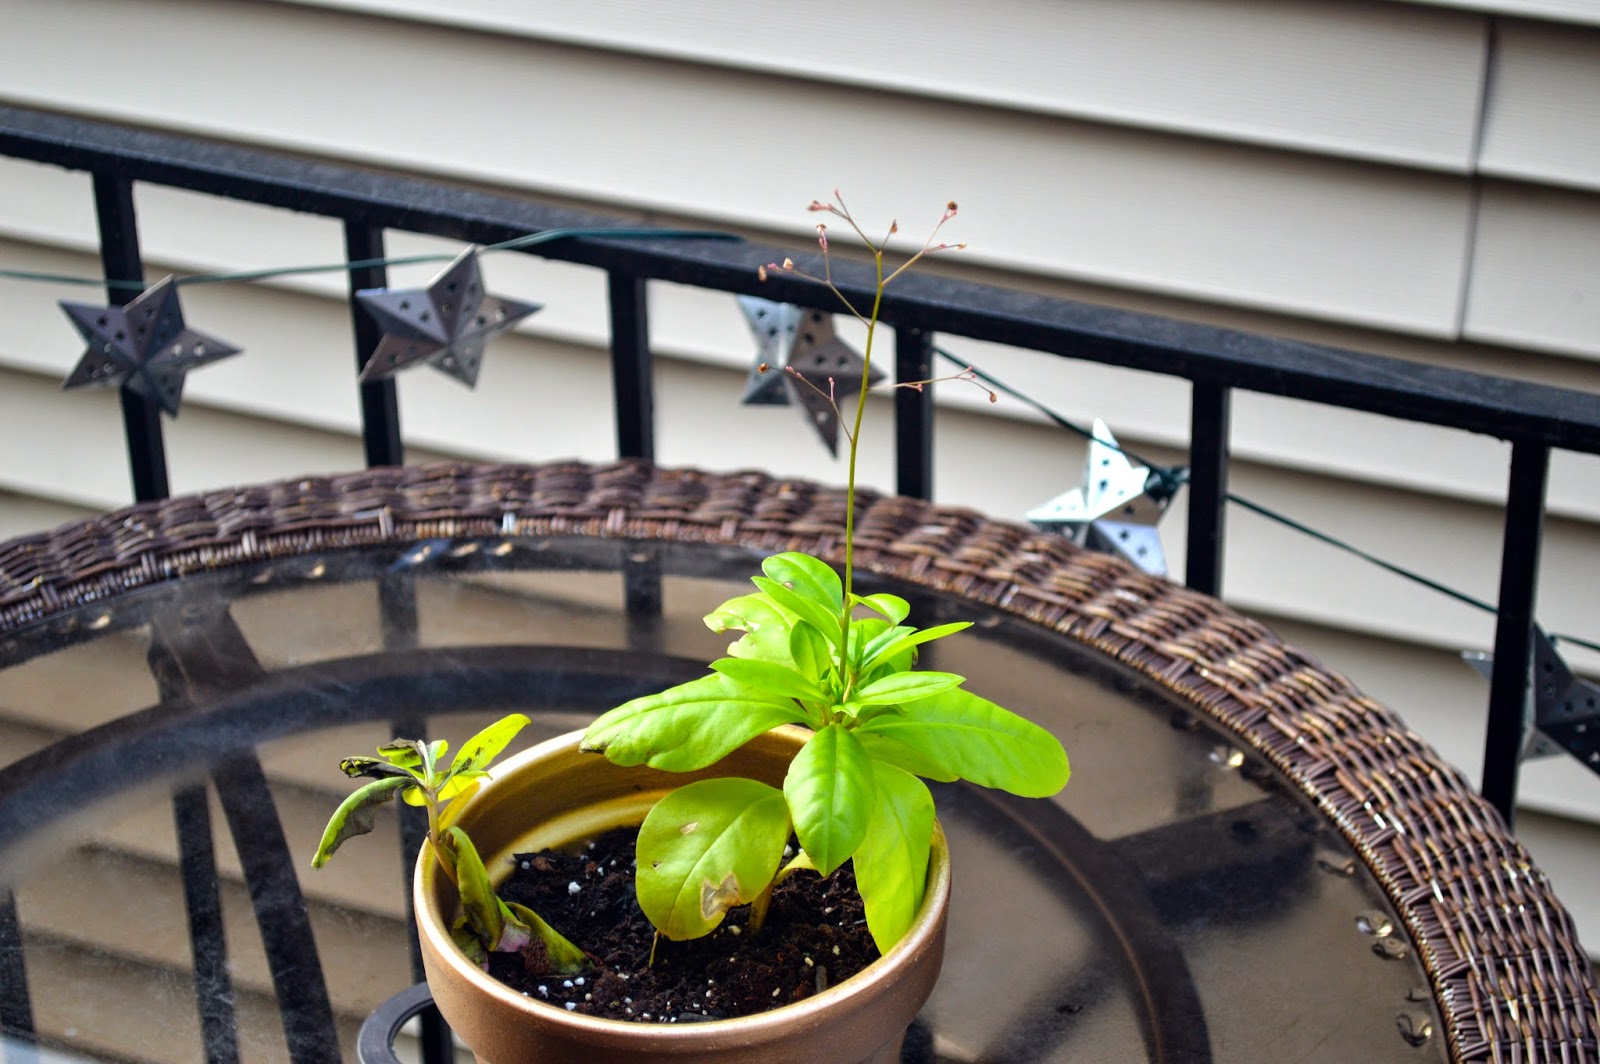
I planted mint in this pup because mint apparently doesn't need a ton of sun and it's fairly hard to kill. I had big dreams of my apartment smelling like mint every time I opened the door, but so far... nothing to report. Still though, I can't wait to make mint adorned drinks all summer :D

Four 4ft x 1/2 inch Copper Pipes: (Lowes) $52
Twelve 1/2 inch Copper Pipe Straps: (Home Depot) $7
One 8x8inch Plywood Box: (Michaels) $12
24 nuts/bolts: (Amazon) $7
One Plastic Pot: (Lowes) $2
Felt furniture pads: Had
Paint: Had
Sweet Mint: $2
Potting Soil!: (Lowes) $5
Total: $87

^^ My DIYs always end up costing so much more than I think they will. I can't really compare this price to a "store bought" version, because I honestly haven't seen anything like it! I guess that's my favorite part about DIY-ing, you always end up with something one-of-a-kind :D

Cute Modern Planter DIY
Cute DIY Planter
Custom DIY Modern Planter

Photos: Nikond3200 35mm / Edits: Adobe Lightroom

Lengthening Your Curtains DIY

Lengthen your curtains DIY

My apartment looks straight across a skinny alley into someone else's kitchen. After a few awkward encounters (picture me waving at strangers while they cooked, or Tom Cruise's scene from Risky Business lip-sync-dancing in my tighty whities), my options became 1) keep the blinds of my studio closed and live in a dungeon or 2) buy some kind of curtain.

News flash: curtains are expensive. And also, you're supposed to measure the window before you buy. 

After a long time of speculation and non-measuring, I found myself in the curtain aisle at Target yet again in a fluster, decided to screw it, picked up three packs of curtains that "I bet are the right length" and marched them home. It seemed crazy expensive, but for a while my problems were solved! But, shortly after I threw away the receipt and packaging, my friend came over and said "aren't curtains supposed to hit the floor?"

Ummm,..... What? Are they? I don't know! So I researched. And most do. And I became kind of obsessed with it. The idea haunted me like three soft, white, 95 inch, fluffy ghosts. Every blog I read, every Apartment Therapy post I stalked, floor length curtains were everywhere, and mine fluttered softly 1.5 feet above the ground. Then the blog gods smiled on me and I stumbled upon a post about lengthening curtains. & even though Katie only needed a few extra inches, and I needed several more feet, I realized it was doable, and I could either give it a try or spend one hundred more dollars on new curtains.

So.......  with a seam ripper I removed the bottom seam of my curtains and then measured the amount of length I needed, width and height, to get to the floor. At JoAnn's Craft and Fabric Store I picked two fabrics I wanted to layer at the bottom of my curtains and an "apparel trim" (but it took me a few trips around the store to find out they were called that) to add to the very bottom. I got all those cut at the cutting station for enough fabric for my three windows (little tip: you have to pull a number, like the deli, to get in line at the cut station). At home, I used fiskers to cut and pin together the first curtain and sloooooowwwwly stitch the entire thing together. It took f.o.r.e.v.e.r. I'm not kidding. Ten hours. TEN. After I finally finished I decided there had to be an easier way, and I ordered stitch witchery on Amazon. 

It saved me like, a million hours. Basically, it's magic. You cut your stitch witchery like it's scotch tape. Then put it between your fabrics, and with the wool setting on your iron, and a damp cloth on top of both fabrics, press down firmly. Let it dry. Then you're good! Even with a small table top ironing board, it cut about 16 hours off my time. 

Seam Ripper: $3
2 yards of fabric one: 9.99/yard = $20
2 yards of fabric two: 14.99/yard = $30
4 yards of lace apparel trim: $20
Stitch Witchery: $4.36
Iron: borrowed
Total: $77.36

As it turns out, it would have been around the same price for me to just buy new curtains. But, I still feel really proud of my creation, and I'm not sure what I would have done with three old curtains stuck in my closet, anyway. Plus, like all my DIY's, I love that these are completely custom made and  no one else in the world has them. I would encourage you to give it a try! 

Let me know if you do! xox

^^^ with stitching.

^^^ with stitching.

^^^ with stitch witchery.

^^^ with stitch witchery.

lengthen your curtains DIY
^^ blurry... it's hard to balance on a stool with your camera in the air above your head 😋

^^ blurry... it's hard to balance on a stool with your camera in the air above your head 😋

Lengthen your curtains by layering DIY

P.S. This is what the curtains used to look like. 


Photos: Nikon D3200 35mm and kit lens; Edits: Adobe Lightroom / Chair: Move Loot / Side Table: DIY / Pillow: JoAnn's / Rug: Rugs USA / Lamp: Ikea 

DIY Easy Tree Slice Side Table

DIY easy tree slice side table

I love craft and office supplies stores. Kinda weird, I know. Lucky for me, I pass a Michael's every day on the mile walk between my office and Caltrain station and often find a reason to stop inside. One day I found these wooden slabs, and though I didn't know what I was going to do with it, I bought one. My first plan was to make a hanging side table. Then, wait, serving tray. Wait, wait, maybe a cheese plate?

Finally, I landed on small side table and got to it.

The tree slice came pre-sanded with natural bark along the outside. Spoiler: dry tree bark is pretty flakey. I used a coarse grit sand paper (100) to take off the top coat of bark along the sides and a fine grit sand paper (220) to sand down the top as an extra precaution. Admittedly, I didn't do great research, so I didn't know basswood soaks up stain supahhhhh fast. In retrospect, I should have probably conditioned it ahead of time, but instead, I went straight to the ebony stain and it turned the wooden tree slice PITCH BLACK.  

I immediately tried to wipe it off, but couldn't get much. So, I let it dry overnight and used several pieces of sandpaper to lighten the coat in the morning. I didn't love it, but couldn't turn back. So, I added three coats of matte polyurethane to the top and bark (two hours apart with light 220 grit sanding in between) and let it set for 48 hours. 

Two days later, it was looking much better :D The matte polyurethane really lightened it up. I lightly sanded the whole thing one last time, wiped it down with a wood conditioner and attached the  21" tripod stand I bought online with four 3/4 inch wood screws. 

BOOM. A one weekend wooden tree slice side table. 

Easy DIY Tree Slice Side Table
Easy hardware application

Round Wooden Tree Plaque (Michaels): $11
Multi Pack Sand Paper (Discount Builder Supplies): Had
Tripod Stand (hairpinlegs.com): $36.50
Ebony stain (Home Depot): Had
Matte Polyurethane (Home Depot): Had
Goat Hair Brush (Home Depot): Had
Wood Screws (Nob Hill Hardware): Had
Wood Conditioner: Borrowed
Total: $47.50

Photos: Nikon D3200 Kit Lens / Edits: Adobe Lightroom

Repurposing wood scraps for under-counter storage

One of the big problems I have in my small SF apartment is kitchen storage. I have a few under-sink and under-counter cabinets that need to house all my food, glassware, water bottles, kitchen appliances, etc. There's a decent amount of space available, but it's all vertical. So, without shelves, I couldn't utilize it.

Luckily I held on to a few wood scraps left from my corner coffee bar and thought I could try my hand at some quick shelves.

Under Counter Storage
DIY Under Counter Storage

These brackets come in useful packets of four with fitted screws. I didn't know that. I found these for 25 cents each in a used box at the hardware store. Also, because my wood is not quite the size of my cabinets, I could only use three of the brackets on each shelf: two in the back corners and one on the wall-facing side (see photo below).

DIY under cabinet storage

Screw the brackets into the wood. Then use a level to screw the wood shelf into the cabinet. SIMPLE AS THAT. 

So easy. After I added this to the wall it dawned on me I could have painted the cabinet back board or, since it is an apartment, added some kind of removable wall paper or something. Whoops, that would have looked really cute. Next time :D

diy cupboard shelves

Also, I decided to add Cup Hooks for my coffee mugs. It works best to screw these in by hand after the board is hung up.. I had to remove my original hooks from the photos above to screw the shelf in, but I ended up replacing them anyway with a larger "C" for my mug handles. Happy organizing!

DIY: METALLIC GOLD PLANTER

A few weeks ago I went down to South Carolina to visit my family & came back with two plants. One of them was the Jewels of Opar. My Grammie divided hers into several styrofoam cups & sent us each home with a section. 

The little styrofoam cup was only meant to last the car ride home, but I accidentally made it last through my trip to Siesta Key, then my trip to New York, then my trip to Baltimore. 

See I was trying to find a cute pot! Something unique, but affordable. But as my Jewels of Opar started to die, I realized I didn't have the luxury of time. I caved & bought the 97 cent standard pot from Home Depot.

then  I remembered my golden spray paint! I gave it two coats, they dried in just a few minutes!

As you can see (left) I don't have so much luck with plants. So I took a gold paint pen for a little quiet  encouragement. Moral of the story: everything looks better in gold :)